 Skip to content
If you’ve ever uploaded a photo to a website and watched it crash the page layout, or tried to email a 20MB image that wouldn’t attach, you already understand the problem this guide solves. Knowing how to resize an image in Photoshop correctly is one of the most useful skills in image editing — and one of the easiest to get slightly wrong if nobody ever shows you the right settings.
This guide walks through every method Photoshop offers, explains the difference between resizing and resampling (the part most tutorials skip), and shows you exactly which resolution to use for web, print, and social media. By the end, you’ll know how to resize an image in Photoshop without blurring, stretching, or pixelating it — and we’ll also show you a faster free option for the days you don’t have Photoshop open at all.
Quick Answer: How to Resize an Image in Photoshop in 30 Seconds
If you just need the fast version, here it is:
- Open your image in Photoshop.
- Go to Image > Image Size (or press Ctrl+Alt+I on Windows / Cmd+Option+I on Mac).
- Make sure Resample is checked.
- Enter your new Width and Height in pixels.
- Click the link icon to lock the aspect ratio so your image doesn’t stretch.
- Choose a resampling method (Bicubic Automatic works for most cases).
- Click OK.
That’s the core answer to how to resize an image in Photoshop, and it covers maybe 80% of use cases. The rest of this guide covers the details that determine whether your resized image looks crisp or soft — plus two other resizing methods worth knowing.
Resize vs. Resample: The Distinction Photoshop Tutorials Skip
Before going further, it’s worth understanding a distinction that genuinely changes your results. People use “resize” and “resample” interchangeably, but Photoshop treats them as two different operations:
- Resizing changes the print dimensions (inches, centimeters) of an image without changing the number of pixels it contains.
- Resampling changes the actual pixel count — Photoshop either adds new pixels (upscaling) or discards existing ones (downscaling) using an interpolation algorithm.
When most people search how to resize an image in Photoshop, what they actually want is resampling — changing the pixel dimensions of a photo so it fits a specific width and height on a screen or in a document. Photoshop’s Image Size dialog handles both, which is exactly why it’s the method covered first below.
Method 1: How to Resize an Image in Photoshop Using the Image Size Dialog
This is the standard, most reliable method, and the one Adobe itself recommends for most resizing tasks.
Step 1 — Open your image. Go to File > Open and select your photo.
Step 2 — Open the Image Size dialog. Click Image in the top menu, then Image Size. The keyboard shortcut is Ctrl+Alt+I (Windows) or Cmd+Option+I (Mac).
Step 3 — Choose your unit of measurement. Click the dropdown next to Width or Height and pick pixels (for screens), inches or centimeters (for print), or percent (for proportional scaling).
Step 4 — Lock the aspect ratio. Click the link icon between Width and Height (sometimes labeled “Constrain Proportions” in older versions). This keeps your image’s proportions intact so it doesn’t look squashed or stretched.
Step 5 — Enter your new dimensions. Type your desired width or height — the other field updates automatically if the aspect ratio is locked.
Step 6 — Check Resample. This tells Photoshop to actually add or remove pixel data rather than just changing the print size. Leave it checked for almost all on-screen and digital use cases.
Step 7 — Pick a resampling method. Photoshop offers several:
- Bicubic Automatic — lets Photoshop choose the best method (a safe default).
- Bicubic Smoother — best when enlarging an image.
- Bicubic Sharper — best when shrinking an image.
- Preserve Details 2.0 — best for significant upscaling where detail matters (with an optional Noise Reduction slider).
Step 8 — Click OK. Your image is now resized. Save it with File > Save As, or use File > Export > Export As if you want to keep your original file untouched and export a separate, smaller version.
This single workflow answers the core question of how to resize an image in Photoshop for the vast majority of everyday tasks — web graphics, email attachments, presentations, and document images.
Method 2: Resize Using Free Transform (Ctrl+T)
Free Transform is the second core technique for how to resize an image in Photoshop, and it’s faster when you’re resizing a layer inside a larger composition rather than an entire flat image — for example, scaling a logo, a product photo, or a design element on a canvas.
- Select the layer you want to resize in the Layers panel.
- Right-click the layer and choose Convert to Smart Object first — this lets you scale up or down repeatedly without permanently degrading quality.
- Press Ctrl+T (Windows) or Cmd+T (Mac) to activate Free Transform.
- Drag a corner handle to resize, holding Shift to maintain proportions (in newer Photoshop versions, proportions are locked by default).
- To enter exact values, type a Width and Height percentage directly in the options bar at the top.
- Press Enter to apply the transformation.
Converting to a Smart Object first is the step most people skip, and it’s the one that actually protects image quality if you think you might resize the same layer again later.
Method 3: Resize While Cropping
If you need an image to fit an exact pixel size — say, a 1080×1080 square for social media — the Crop tool can resize and crop in one motion:
- Select the Crop tool (C).
- In the options bar, set the fields to W x H x Resolution.
- Enter your target width, height, and resolution (e.g., 1080 px, 1080 px, 72 ppi).
- Drag the crop boundary over your image and press Enter.
Photoshop will crop and resize simultaneously, which is useful when your image’s aspect ratio doesn’t already match your target dimensions.
Choosing the Right Resolution: Web vs. Print
A part of learning how to resize an image in Photoshop that trips people up is resolution — measured in PPI (pixels per inch). Here’s the simple version:
| Use Case | Recommended Resolution | Why |
| Websites, social media, email | 72–150 PPI | Screens display pixels, not inches, so higher PPI just increases file size without improving on-screen sharpness |
| Standard printing | 300 PPI | Printers need more pixel density per inch to avoid visible dots or blur |
| Large-format printing (banners, posters) | 150–200 PPI | Viewed from a distance, so slightly lower density is acceptable |
If you’re only publishing online, focus on pixel dimensions (e.g., 1200×800) rather than PPI — resolution mostly matters once ink hits paper.
How to Resize an Image in Photoshop Without Losing Quality

This is the single most common follow-up question, so it deserves its own section. Four habits make the biggest difference:
- Start from the highest-resolution original you have. Downscaling preserves quality far better than upscaling, since Photoshop is removing existing detail rather than inventing new detail.
- Use Smart Objects before transforming layers, so you can resize multiple times non-destructively.
- Match the resampling method to the direction you’re scaling — Bicubic Sharper for shrinking, Bicubic Smoother or Preserve Details 2.0 for enlarging.
- Sharpen lightly after resizing, not before. Resampling softens edges slightly, and a small amount of sharpening (Filter > Sharpen > Smart Sharpen) restores crispness without introducing artifacts.
Following these four habits is the practical answer to how to resize an image in Photoshop while keeping it looking like the original.
Maintaining Aspect Ratio (And Avoiding Distortion)
Aspect ratio is the proportional relationship between an image’s width and height. Breaking it accidentally is the single most common visual mistake people make when resizing — faces get squashed, logos get stretched, and the error is usually obvious to anyone who looks at the result.
To avoid it: always confirm the link/chain icon is enabled in the Image Size dialog, or hold Shift while dragging Free Transform handles. If you genuinely need a different aspect ratio than your original (for example, fitting a landscape photo into a square Instagram post), crop first, then resize — don’t just stretch the dimensions to fit.
Resizing Multiple Images at Once (Batch Resizing)
Photoshop can resize a folder of images automatically using the Image Processor script:
- Go to File > Scripts > Image Processor.
- Select the source folder containing your images.
- Choose an output folder.
- Set your file type (JPEG, PSD, or TIFF) and check Resize to Fit, entering your target width and height.
- Click Run.
This is genuinely useful for photographers or designers processing dozens of images in one batch, but it requires the desktop application, a license, and some setup — which is worth knowing before you start, especially if you only need to resize one or two images right now.
Common Mistakes When You Try to Resize an Image in Photoshop
- Forgetting to check Resample when changing pixel dimensions — without it, Photoshop only adjusts print size, not the actual file.
- Upscaling too aggressively. Photoshop can’t invent detail that was never captured; pushing a small image up 400% will look soft no matter which algorithm you choose.
- Ignoring the aspect ratio lock, resulting in stretched or squashed images.
- Resizing the original file directly instead of exporting a copy, which permanently discards the higher-resolution version.
- Using the wrong PPI for the use case — entering 300 PPI for a web image does nothing but inflate file size.
What If You Don’t Have Photoshop Installed?
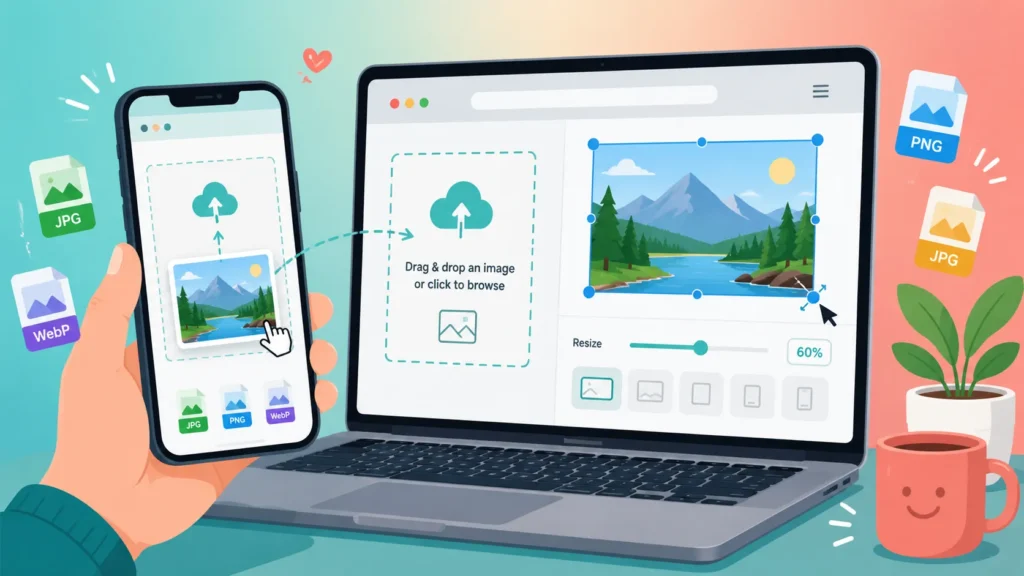
Here’s something worth being honest about: Photoshop is a powerful tool, but it’s also a paid subscription, and installing it just to resize one photo for an email or a marketplace listing is overkill for a lot of people. If you searched how to resize an image in Photoshop because you needed a quick answer — not because you’re planning to learn the software properly — a free browser-based resizer will usually get you there faster.
Our tool, Image Resizer in Pixel, lets you resize images to exact pixel dimensions directly in your browser, with no install, no account, and no watermark:
- Drag and drop an image, set your width and height in pixels, and download instantly
- Maintain aspect ratio automatically with a single toggle
- Batch resize up to 20 images at once for free
- Convert between JPG, PNG, WebP, and other formats during resizing
- Built-in presets for Instagram (1080×1080), Amazon listings (2000×2000), Facebook covers, LinkedIn banners, and more
- Files are processed securely and auto-deleted after 24 hours
| Photoshop | Image Resizer in Pixel | |
| Cost | Paid subscription | Free |
| Install required | Yes | No — browser-based |
| Learning curve | Moderate | None |
| Batch resizing | Yes (script-based) | Yes (drag and drop, up to 20 images) |
| Best for | Detailed photo editing, retouching, design work | Quick, exact-pixel resizing for web, social, and e-commerce |
If your goal is genuinely learning photo editing, Photoshop is worth the investment. But if you just need an image resized to specific pixel dimensions right now, you don’t need to learn how to resize an image in Photoshop at all — a free online resizer does the same core job in seconds.
Frequently Asked Questions
How to resize an image in Photoshop without losing quality?
Start from the highest-resolution original available, use Smart Objects for non-destructive scaling, choose the resampling method that matches your scaling direction (Sharper for shrinking, Smoother for enlarging), and apply light sharpening after resizing.
How to resize an image in Photoshop for Instagram or social media?
Use the Crop tool with W x H x Resolution set in the options bar, or the Image Size dialog with Resample checked. Common targets are 1080×1080 for square posts, 1080×1350 for portrait posts, and 1080×1920 for Stories.
Can I resize an image in Photoshop without changing its proportions?
Yes — keep the link/chain icon enabled in the Image Size dialog, or hold Shift while using Free Transform. This locks the aspect ratio so width and height scale together.
What’s the difference between resizing and resampling in Photoshop?
Resizing changes the print dimensions without altering pixel count; resampling changes the actual number of pixels by adding or removing them. Most everyday resizing tasks actually require resampling.
Does Photoshop reduce image quality every time you resize?
Downscaling rarely causes a noticeable quality loss if you choose the right resampling method. Upscaling has more visible limits, since Photoshop can’t recover detail that was never in the original file.
Is there a free way to resize an image without using Photoshop?
Yes — tools like Image Resizer in Pixel let you resize images to exact pixel dimensions directly in your browser, free, with no installation or account required.
Final Thoughts
Whether you’re preparing a photo for a website, an online store, or a social media post, knowing how to resize an image in Photoshop properly — checking Resample, locking your aspect ratio, and matching resolution to your output — will save you from blurry, stretched, or oversized images every time. And on the days you need a result in seconds rather than minutes, Image Resizer in Pixel is sitting right there in your browser, free and ready to go.
